

Moulding and Laminating a Composite Undercarriage
This article was written and submitted to us by Club Member Iain Jeffrey
(Published by RCME Magazine in their 2014 Special)

There are a number of different ways of producing a composite undercarriage, this method is by no means a definitive way of going about the task, but this process I’ve used works very well and produces a finished item which is both strong and durable.
The first thing that will need to be decided, is the size of u/c you require, this is generally (if you are upgrading) the same as the item you wish to replace (a good place to start) but, it does give you the scope to make a bespoke item for your chosen model.
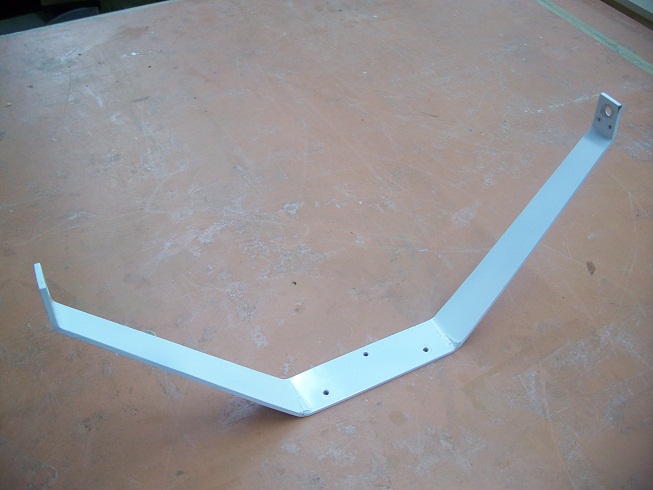
For the purpose of this article I’ll be making a replacement for my 78” Capiche model. The model was supplied with an aluminium u/c which had the most annoying habit of bending on the smoothest of landings. The item is pictured below.
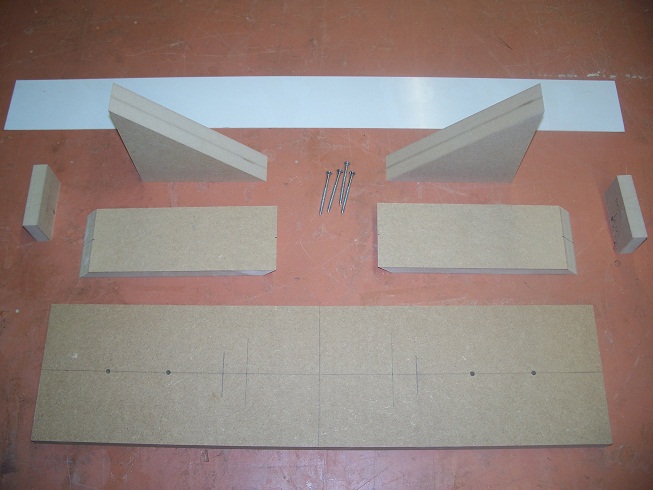
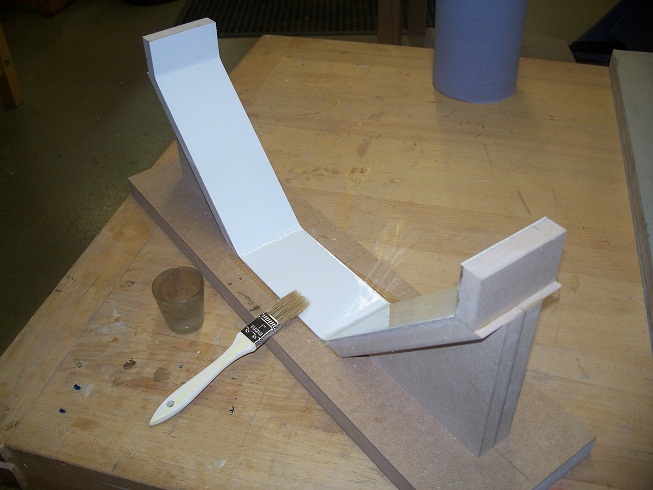
The next thing to do once all the measurements are defined is to construct a mould, from which to produce your part. Looking at the following pictures you can see all I’ve used is some small pieces of MDF and a strip of 1mm gloss plastic-card glued to the top surface. The mould doesn’t have to be excessively strong, but enough not to distort during the application of materials. If you can’t get a hold of plastic-card, applying filler to the corners and painting the mould with gloss paint will also do the job. The final finish of the mould surface is most important, this will mirror the finish of your moulded piece; this is also true for anything moulded using this technique.
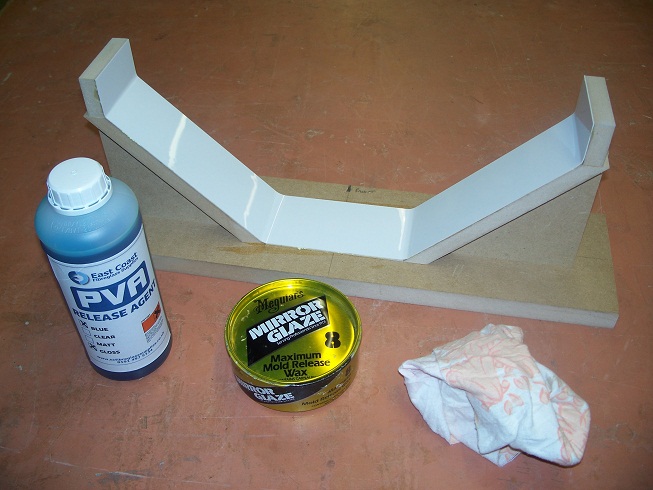
The completed mould ready to apply wax/PVA release agent. Either wax or release agent can be used, both give good results, but for the process used, I’ll be waxing the mould as a glossy finish is required for the finished part.
From the picture you can just see an arrow head drawn on the base and the word ‘Front’, there is a reason for this. I’ve glued the two top pieces on at a very slight angle (towards the arrow) to give the finished u/c a ‘toe in’ (these will be the part at which the wheel axle will be fitted when moulded); this gives better ground handling and a straighter run on take-off. I’ve set this ‘toe in’ angle at approximately 1 degree or 1mm each side, (it doesn’t need very much), and the width of this particular mould is 80mm.
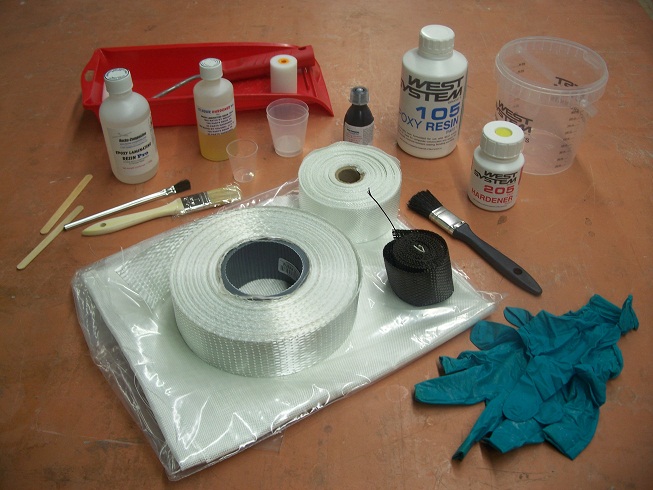
Next up are materials. Epoxy is the resin of choice here, quite brittle on its own but very strong once combined with the cloth, durable and fuel proof. I’ve purchased a couple u/c in the past, these have gone very sticky once they’ve got covered in fuel and exhaust residue. I’ve used both the West System 105/205 and resin supplied by Bucks Composites (Pro Laminating Resin), each resin and its hardener work very well and give enough time to work with comfortably, generally 10-15 minutes. If you require a longer working time, both suppliers provide a hardener which extends the ‘pot life’ of the resin. Another added benefit of using epoxy is that it doesn’t have a strong odour, unlike polyester resin systems.
The type of cloth used, are glass and carbon fibre, in a number of different weights and weave. Mixing cups, colouring pigment, brushes, gloves, roller tray, soft cloth and acetone (for cleaning), are items you will also need to help you complete the task.
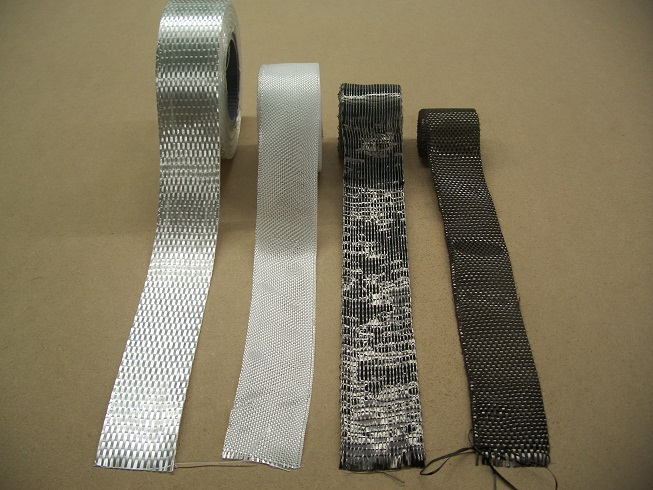
Here we have glass cloth and carbon fibre in different weave patterns. Cloth can be purchased by the roll; this comes in various widths e.g. 25mm, 50mm, 75mm etc. and weights, 200g per square meter, 375g, 600g etc. The weave pattern/direction are also important, hence why the different types shown below. I use unidirectional, this has 95% of the weave is in one direction and 50/50 weave in both directions at 90 degrees to each other. The unidirectional cloth gives the u/c its strength as the weave travels along its length and 50/50 is used to bind the layers together, giving some torsional strength.
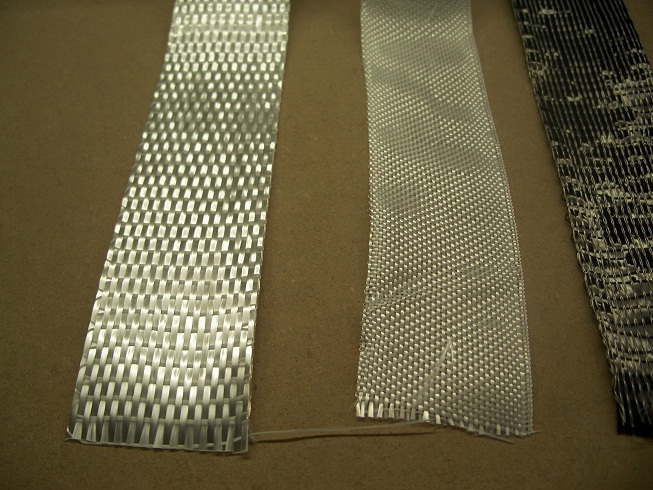
Here’s a close up of the weave in the glass and carbon fibre cloth. Unidirectional on the left, 50/50 weave on the right.
|

|
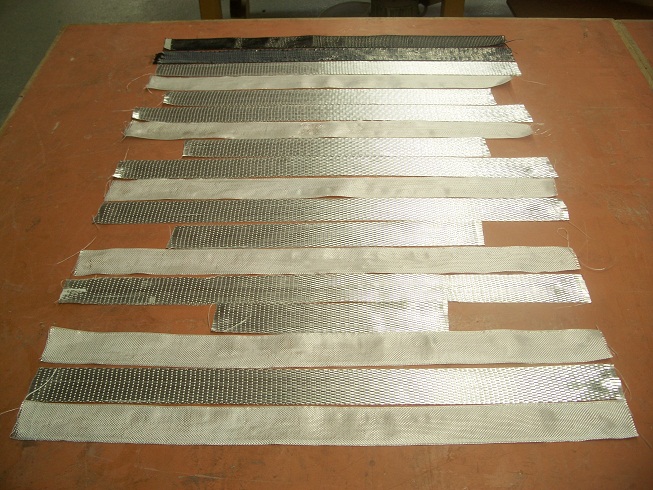
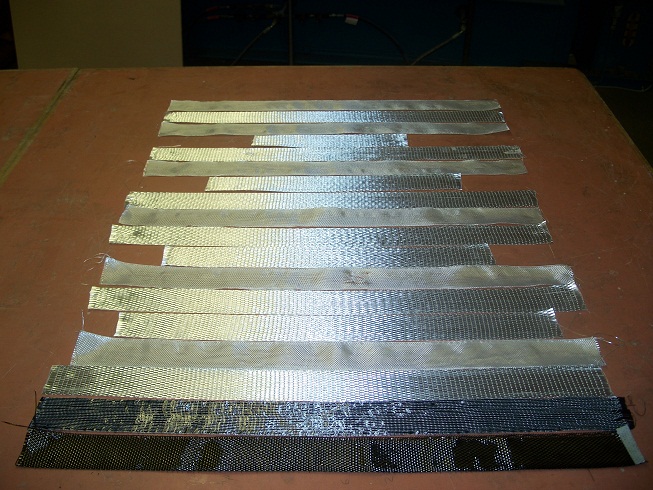
When you have your cloth prepared, cut it to length (a little longer than the mould), I’ve used 50mm wide tape. The next couple of pictures show the order and types of cloth ready to be moulded.
The finished top surface for this u/c is going to be the 50/50 carbon which will be seen as the finish, then unidirectional carbon followed by the multiple layers of glass cloth. The amount of layers to give the thickness depends upon the size and weight of the model for which it is intended, in all, this u/c used 18 pieces to give a top mounting of 7mm and an axle mounting point of 5mm.
The following pictures visually explain what I’ve done, using 600g unidirectional and 200g 50/50 alternately to give the strength the part will need. You will notice some slightly shorter lengths, getting shorter. This gives a thicker mounting point to the model underside which really needs to be rigid and also allows flexibility toward the axle fixing points. The transition is stepped gradually to avoid a single stress point, which may fail after a heavy landing.
|
|
Now the cloth’s cut ready to go, it’s time to start polishing the mould. I use Maguire’s mould release wax; this has not let me down yet. You will need to wax/polish using a soft cloth (as not to mark the mould) up to 5/6 times to ensure a nice glossy finish, allowing it to dry between coats and buffing off. If you use the mould again it won’t need as many wax coats next time..

Now the mould has been fully waxed, the resin is mixed by volume or weight to the supplier’s recommendation. For the top finish coat, mix just enough to coat the mould (quantities will vary depending on the size of the mould and type of cloth used later). At this point a ‘Gel coat’ could be used, I find this not really necessary for the part that is being produced.
This ‘top’ coat is just a thin layer of resin painted onto the mould and left to ‘go off’, before the layers of cloth are added. The mixed resin is applied using a soft paint brush, whilst applying the resin, it will separate and pool on the waxed surface, leaving voids (with gel coat this wouldn’t separate due to its thicker consistency). If you just keep working the resin with the brush on the surface it will start to go off after 10-15 minutes and the voids will no longer appear, clean your brush (along with mixing cups etc.), they can be used later. Once you get to this stage the resin needs to be left for a little while (a warm place would be good as it speeds the process up), until it just goes to go off tacky i.e. doesn’t stick to your finger too much.
When this first layer has cured to the point of which previously mentioned, mix up another batch of resin, a bit more this time to start laminating with the cloth. I tend to mix up to 60ml, this gives enough resin for 5-6 layers and stays usable, after about 10-15 minutes you can notice the resin starting to thicken, and doesn’t run so readily.
Once the resin is mixed it’s a good idea to pour it into a larger tray (4”roller trays are ideal for this) or a larger container, this will avoid excessive heat build-up and stops the resin going off too quickly, which in turn extends its workable time.
Take the paint brush you previously cleaned or a new one (if it’s gone hard) and cut the bristle to half its length, this makes stippling the resin/cloth much easier and reduces the amount of air bubbles produced.
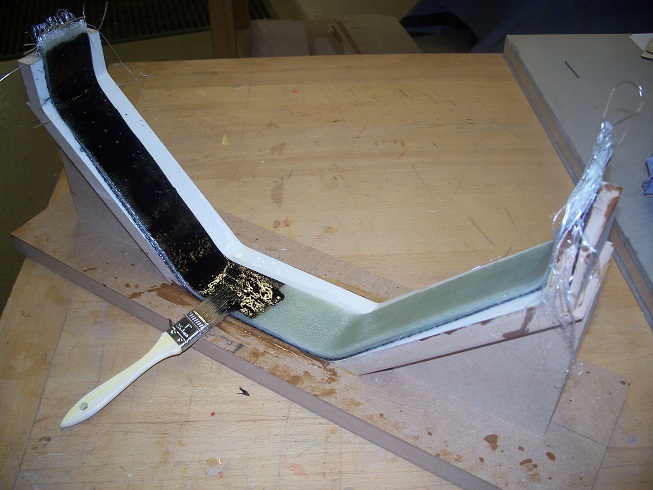
Lightly apply a thin layer of resin to the mould (the previous will still be quite soft), taking the first layer of carbon cloth (a good idea to wear gloves at this point as things start to get sticky), wet this out with resin on a plastic bag. Once the cloth is ‘wetted out’ apply this to the mould, starting at the centre, work it out toward the top edge of the mould using the shortened bristle brush. It is most important that you spend a bit of time applying the first piece of cloth (this will be seen if you are not painting the finished component) pushing out any air bubbles as you work up the mould concentrating also on any corners, excess resin will now seep through as you stipple down, try not to be too aggressive with the stippling as this will distort the weave within the cloth.

With the first layer ‘stuck down’ apply the next directly on top, in this case a piece of 200g unidirectional carbon. This will give it a lot of strength and also hide any gaps within the weave of the first layer. Push the cloth down with the brush, the excessive resin from the previous layer and brush will start to seep through. Once this is complete, lightly coat this layer with resin and start to add the first piece of glass cloth.
Cloth and resin are continually added as previously described, building up alternating layers and thickness in the order as was laid out to begin with. Keep mixing resin as and when it’s needed, clean equipment as you go along, before the resin starts to go off. The resin and cloth will start to get warm, this is perfectly normal as this is the chemical reaction between resin and hardener.
Toward the last couple of layers (you should have already thought how you wish to finish the underside), this is the time to start adding any colour pigment to the resin if you are going to use it. You may wish to use pigment to colour the whole part by adding to each batch of resin. I’ve finished the underside a few different ways, experimenting as I’ve gone along. These have been last layer of carbon or second last layer carbon then 100g glass cloth (this gives a nice diffused finish through the glass) or the method used here, colour pigment mixed with the resin using 200g cloth. Each finishing technique looks very different.
As the last layers are applied with the coloured pigment, reduce the amount of resin you are using and allow the previous excess to soak up into the cloth, especially the last one, this will give an even matt finish with no glossy pools on the surface.
When colour pigment is used, it is simply added to the pre-mixed resin/hardener at a percentage of the volume, this should be indicated by the manufacturer on the container. Once the last layer has been applied, clean all of the equipment again before the resin starts to cure.

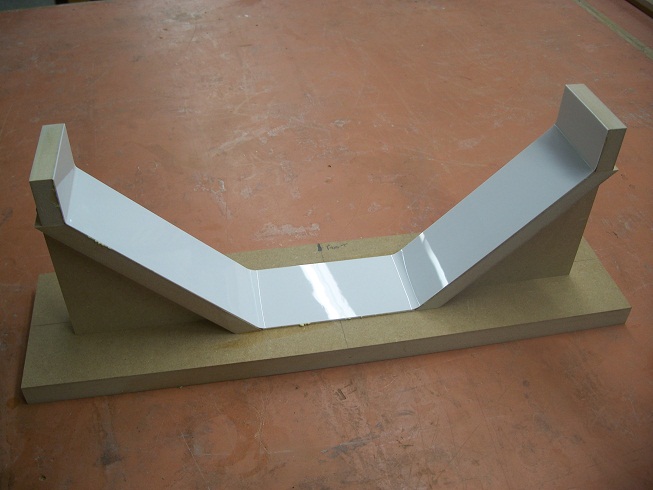
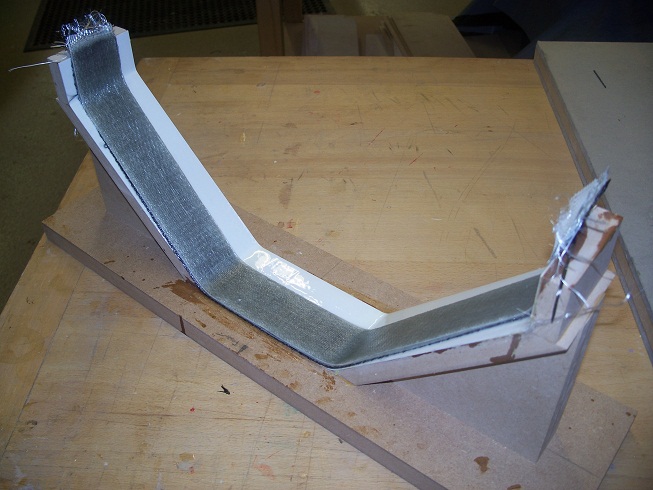
That’s it for now, allow the part to cure in a warm place (airing cupboard is a good place) for 6-24, hours depending on the specific resin used. When you are happy that the resin has completely hardened, it’s time to pop the part off the mould. This shouldn’t take too much effort as long as the mould was suitably waxed, you may need to lever it off a little, don’t use any sharp or hard objects as this will damage the part and mould. Also be very careful of the sharp needles of carbon and glass cloth, thicker gloves are a good idea at this point. At this stage you will find the component still very flexible once released from the mould. I’ve found they stiffen up considerably over a few days just left alone, another technique is to ‘bake’ it in an oven for a while, this will also help set it off but not really necessary for this purpose.

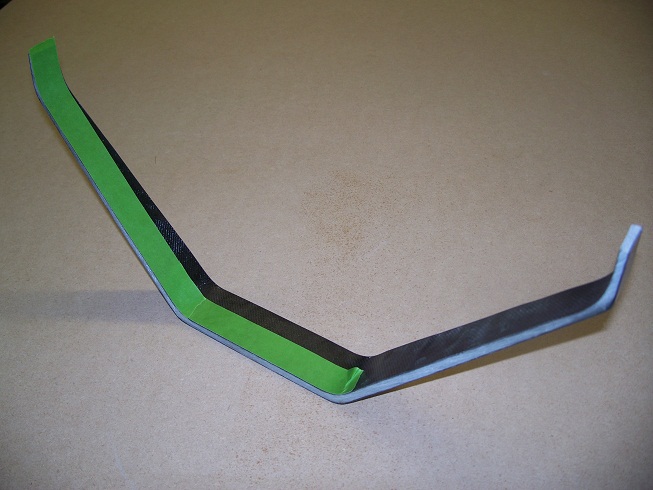
When the component is free from the mould and ‘hardened up’, it should look something like the item in previous picture, a bit hairy with very sharp edges. It’s best to remove all of the unfinished edges at this stage, a band saw is ideal for this (remember to wear a mask and gloves at all times whilst cutting and sanding).
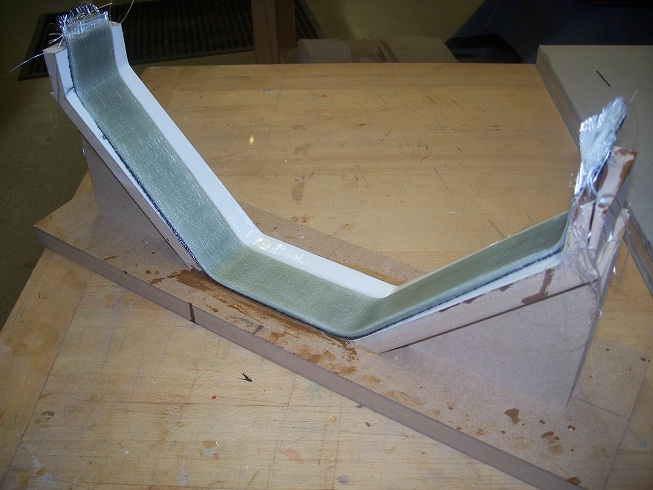
Once all of the sharp edges are removed it’s time to start shaping the part’s final profile. I find applying masking tape the best way of marking out the required shape, as lines marked on with pen/marker tend to disappear under the dust. It’s also a good idea to apply tape to the finished top surface to protect it from scratches and marks as you’re working the part.
After it’s all been cut to size, you’ll find it quite easy to sand down, removing all of the sharp edges using medium to fine aluminium oxide paper, finishing with wet and dry.
All that’s left to do now (painting next, if that’s what’s required), is to drill all of the fuselage mounting and axle holes.
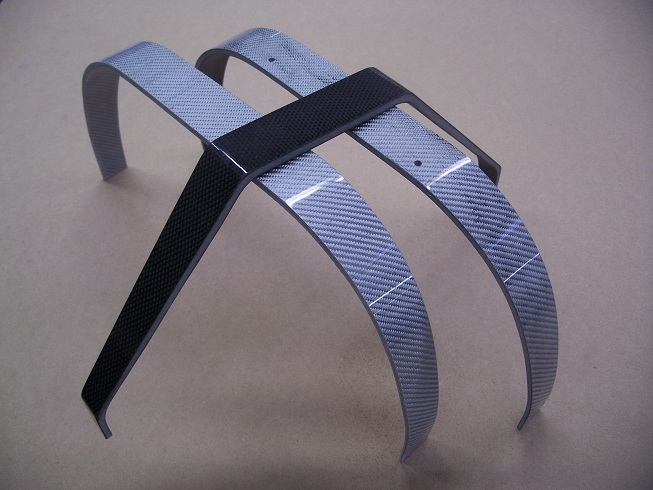
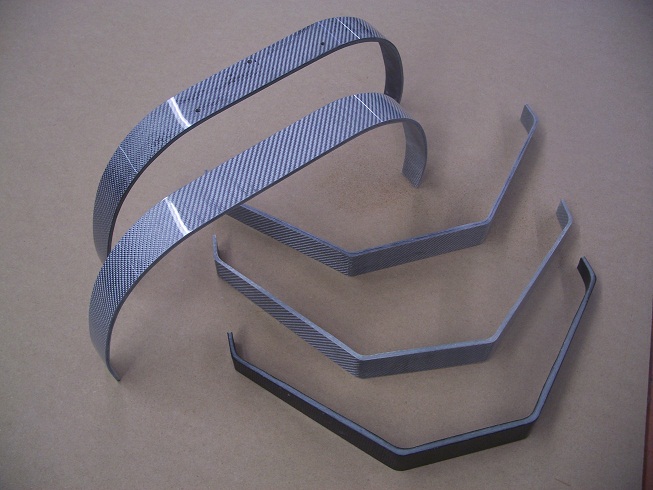
The undercarriage part is now complete and ready to fit to the intended model.
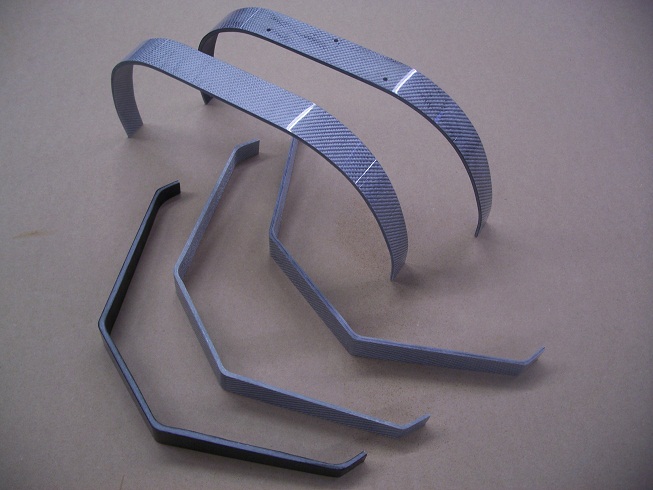
Below are a number of undercarriages I’ve manufactured using the described technique.
|
|
There are a lot of various carbon cloths in a variety colours and weaves, depending on the finish you wish to achieve.
The best way of learning to make a composite u/c, is to experiment. I found that the more carbon you use, the stiffer the part will turn out, and this in turn means less flexibility and prone to being more brittle, and in the advent of a heavy arrival this may shatter. On the other hand, I’ve also found using only glass cloth or little carbon gives a very flexible item, being quite bouncy.
The trick here is to hit a compromise of just the right amount carbon used for the correct level of spring. The thickness and the amount of cloth laminations also have an impact on this, but the more you use the heavier the finished item will be, likewise be sparing on the amount of resin used, it all adds weight, giving no extra structural benefit!
Have a go, good luck!